I have been able to have three shoots during this awful pandemic. Two in my studio where I could control my environment and the last one in Palm Springs where they require vaccine proof to enter businesses and restaurants. And that’s just how it’s going to have to go for me until everyone does their duty to society.
Here is a couple from Palm Springs with Eva. There is a hotel I like to stay at there that always puts me in a funky room full of oddities and modernism. Then there’s the desert just a foot step away which provides some natural influence.
So happy Eva hit me up to go on a little shooting adventure! It was just what I needed, including that hotel breakfast. Memories of being there singing about purple socks with Stephanie Anne, about 10 years ago, was a nice flashback too.
Wash your hands! Stay Safe! Get vaccinated and come work with me. 🙂
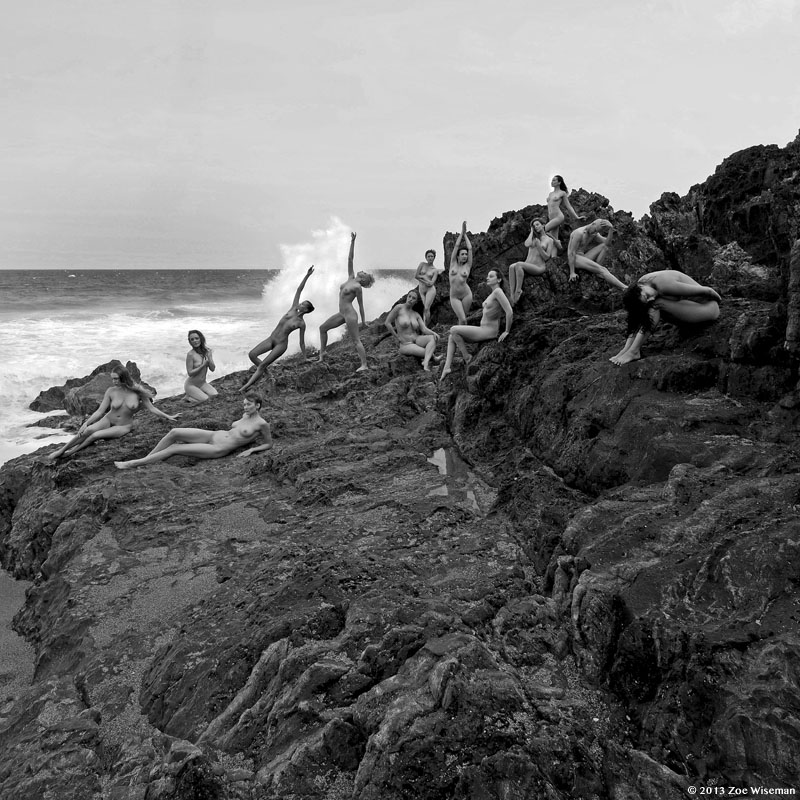
Back in October 2013 I held my annual artist retreat in Coffs Harbor/Sapphire Beach Australia. Here is a little movie short I made while there.
We are currently gearing up for the 2016 fest to be held in Hawaii June5-15. You can read about it here; http://www.zoefest.photo You’ve got two weeks to get on board if you want to go and make art with us.
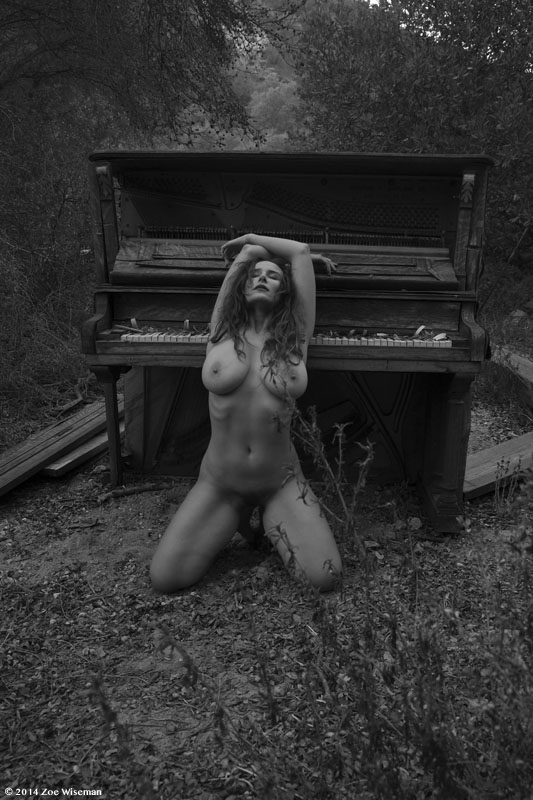
You never know what you will run into hiking in the woods. About 2 weeks later we had a little earthquake and it collapsed this piano into dust. Vassanta and I passed it together at just the right time. Perfect kind of magic.
I’m still shooting often. Just decided to take a break from the computer one day and it turned into a year. How did that happen? I have a backlog of work to catch up on… and probably a lot of models wondering where I disappeared to. I haven’t forgotten!
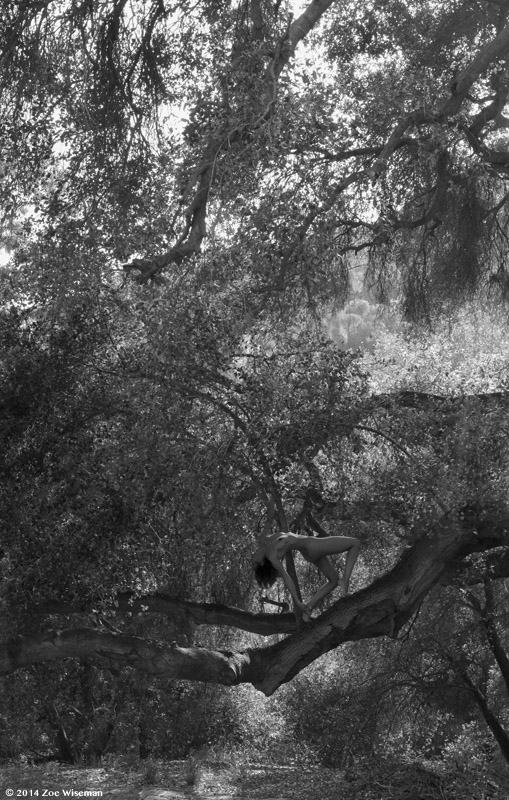
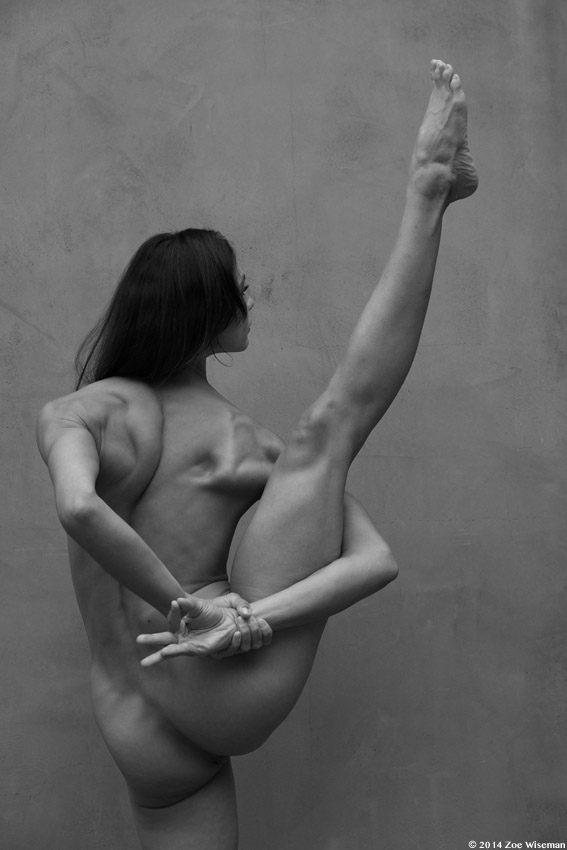
Here are a couple images I made with Jasmina, an incredibly bendy yoga instructor + awesome model.
And of course no photo making is ever complete unless Ollie gets in the frame.
If you follow my blog and my work you know what a Polaroid lover I am. And you may have seen my previous post about the New55 film being developed to replace Polaroid Type 55 film. This is an extremely important tool for artists and I hope you will join me in pledging at Kickstarter. There’s 28 days to go and they’ve already raised almost $100,000.00 of their $400,000.00 goal in order to make a viable product.
I was lucky to be able to test the film and be a part of the beginnings. And I really hope it comes to fruition because I NEED IT FOR MY WORK. I pledged $750.00. Please kick them a little starter fuel to bring this film back into the world of creativity.
Attached is an image I made using the New55 film. I want MORE!!!
We’ve already contacted several potential suppliers to get quotes on parts and line up specification and delivery steps, but there is more to do.
The 4×5 sheet film component — the negative — could come from any one of five potential suppliers including Kodak, Ilford, Foma, Adox or Shanghai. We still need to determine through more testing which negative works the best with the receiver sheet and developer that is finally chosen. The plan is to use a cubic grained emulsion, since this is known to have rapid processing capability and fast transfer to the positive.
The receiver sheet — the positive print — requires significant research and development. Most of the New55 FILM examples you have seen used 20×24 Studios’coaterless receiver sheet. We hope to work with 20×24 Studios to create a reliable supply of receiver for this project and the future, if possible, as coaterless sheets are also compatible with the 20×24 camera. But, that type of sheet is very complex and has at least 8 layers to it. A coater-type receiver sheet, more in keeping with “Old T55” is also a possibility and may be a necessity if we are not able to make the coaterless type. Coater type sheets are somewhat less complex to make, but still have 6 layers. The coating is only one of several important requirements for the receiver: It must have just the right stiffness, thickness and be free of curl. It also has to be light proof, and not swell and shrink during processing. Quite a set of requirements for what looks like just a piece of paper.
An “edge taper” is a machine that we will investigate to assemble the top and bottom of the sleeve together into a peelable assembly. It is assumed that some kind of inking or printing needs to go on this piece so that users will know which is the “lens side”. This machine will have to be designed from the ground up, then built on the premises. It is a significant amount of work and expense.
Each envelope also needs a “stop” which is a thick paper bar bonded to the outside. The purpose of the stop is to prevent the user from pulling the sleeve out too far during exposure. A cutting tool and assembly fixture, and adhesive applicator are required. At this moment, we think that a thermal adhesive and thermal press can apply this strip, using a guide tool, and also perform some of the final thermal bonding on the end of the envelope to allow easier peeling. Two machines/fixtures are needed, at least.
The metal clips that slide into the 545 holder are important and have to be made carefully. The old T55 clip was made with soft steel that had been painted. Painting adds a lot of cost to a sheet metal part and we think it will be easier and better to use a stainless steel clip of a lighter and stronger gauge. Either way we will be buying a tool for use in four-slide machines, and have that part supplied to us by one or more vendors. Our hope is that we do this once, and not have to modify the tooling. If we have a problem, we will possibly have to make new tooling and do other things.
Once we have clips, they must be securely attached to the tongue – a part that holds both the negative, and the chemical pod. The tool used for crimping and thermal adhesive steps has to be designed, built, and tested, and then we have to make sure it can be assembled repeatably and reliably.
The “pod” is a critical component. It has to be sealed and yet also has to burst in just the right directions with just the right amount of pressure. As of this writing, 20×24 is offering to produce these for us at a per-unit cost. Not only is the assembly of the pod critical, what goes in it is also crucial, as it contains developer, fixer, solvent, thickener and toners, along with pH boosting ingredients needed for rapid diffusion transfer reversal to take place. 20×24’s formula for their black and white film is the starting point, and may have to be reformulated depending on the final negative stock and the characteristics of the receiver sheet. Production of the chemical pod is a major undertaking and will happen in parallel with development of the other components.
The entire process of development and manufacturing New55 FILM, and shipping the completed boxes of film to Kickstarter contributors is risky, and estimated to take eight months from the initial funding, but it could be delayed for a variety of reasons as there are long wait times for certain processes and materials to be made, cut, formed, coated etc.
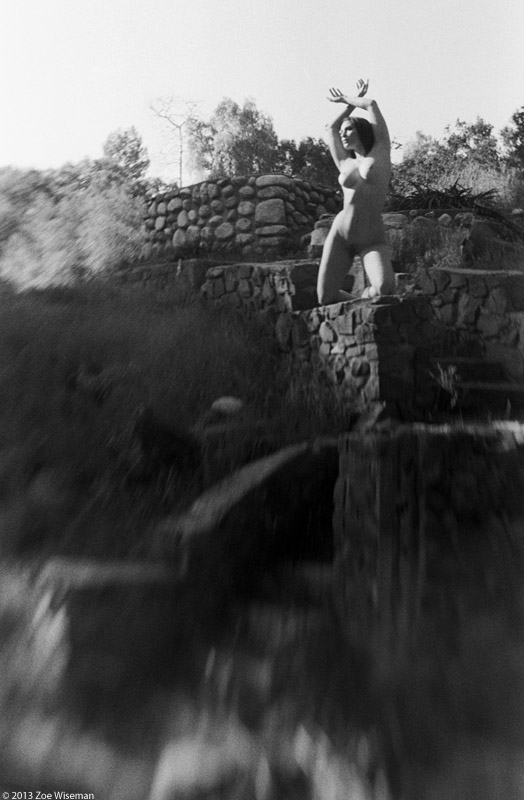
There’s this ruin of a house down the hill from me that burned in a brush fire back in the ’60’s. The stairs and some semblance of foundation is still there and it reminds me a bit of the steps to the sea in Kings Landing, The fictional capital city of Westeros in Game of Thrones, complete with the godswood and everything. YES! I’m a fantasy geek! And I wish George R. R. Martin would put out the next book because Danerys is still sitting there in the Dothraki Sea staring down Khal Jhogo with Drogon, her fierce black dragon. OK, time to shut up and enjoy a photo I made with Carlotta.
I just returned from my yearly festival for ARTnudes Network. One of the images I made there with the model Ella Rose is one of my most surreal to date. When pulling apart the Pos/Neg Type 85 Polaroid I decided to only solarize 1/2 of the image instead of the entire piece of film. What happened was a trip! I’m going to do this more often. This is just tripped out. Check out what it did to her torso. And the peel marks… how did they not affect her skin?
There is zero photoshop manipulation on this photograph. It’s all on the film.
I feel so happy (and lucky) to have been able to test this film and be part of the very beginnings of bringing my way of working back to life. As I am sure those of you who love Polaroid Type 55 (and miss it dearly) are anxiously awaiting the day when you can go out and shoot and develop a negative right in the field may feel just by knowing that the negatives have been exposed. Once in a Blue Moon (when I shot the images) good things do happen! And it’s all thanks to Bob Crowley who has been working like crazy to produce the film again. Please visit the New55 FILM project website and get to know the new goodness!
I received the hand made film and immediately got nervous, “what if I mess this up?” Luckily it is so much like shooting with Polaroid Type 55 that from the first exposure, and handling it so very delicately, I lost that sense of nervousness and just started dancing (uncontrollable dancing happiness) around after each click of the shutter.
It fits in my i545 back just as easily as the Polaroid Type 55 does.
I still have a stash of Polaroid Type 55 locked away in a secret bunker so I was also able to shoot with both and compare the two films. Gladly, I had a model, St. Merrique, who is quite the pro so doing the same poses and remembering them wasn’t a big deal for her. Let’s hear it for awesome models!
As you can see, it’s truly the beginnings of the film. Hand written instructions on the film sleeve and everything. It’s amazing what they have done so far in such a short amount of time. The “Stop” is obviously where you stop pulling up the sleeve before you expose your neg. The dotted lines are a guide for where you need to cut the sleeve open with scissors as this is truly the beginning of the film production. Shooting it like this really made me appreciate it so much more.
See the Polaroid Type 55 negative in the bucket of Sodium Sulfite with the pinkish chemicals washing off the negative, I didn’t get this as much with the New55. It was a bit pink, but not as much.
There are no attachments on the negative of New55 like there are on Polaroid Type 55 (paper – see above, first photo) – which I found to be lovely. A pure sheet of film that has been hand coated almost even resembling a platinum print. I allowed each New55 negative to sit in the bucket of Sodium Sulfite for 5-10 minutes. They suggested using Rapid Fix but I didn’t have any so I used Sodium Sulfite (to clear the chemicals off the neg) and it worked fine.
When you come back to it a white goo has formed on the negative which you have to gently smudge off by hand by carefully rubbing the negative. I suggest wearing rubber gloves for this but I didn’t have any so I just sacrificed myself and dove in naked.
This is what the negative looks like before peeling it off of the sleeve to dip in the bucket. Notice the hand taped love! So cool.
The white section on the sleeve that holds the negative in place are the chemical pods. When you yank the film out of the i545 back these chemicals get dispersed so a positive side of the negative can develop. An immediate contact print. (and yes, that’s a rubix cube)
The positives of the two films are completely different. The New55 positive (on the left) looks like a platinum print while the Polaroid Type 55 positive looks like a straight black and white image. The developing time for the New55 is 2 minutes while the developing time for the Polaroid Type 55 is about 20 seconds. I wish I would have tried developing the New55 just a little bit longer, maybe 3 minutes, to see what it would have looked like, but I JUST thought of that this second. I wonder if it would give me more contrast or darken it a bit. I hope I get to try that out some day soon!
I posted this image on Facebook right after I shot it (before it got flagged by a prude and facebook deleted it) and someone (I forget who) asked me a question that I’ve heard lots of times from photographers. Do you have to expose for the negative or the positive to get a good positive side? Photographers who don’t religiously (I’m a zealot) use Polaroid Pos/Neg always seem to think that the exposure for the positive is different than the exposure of the negative. I THINK THIS IS A MYTH. The way the positive develops is completely different to how the negative develops. And who wants the positive anyway? It’s really only a contact sheet. The way you get a good Positive is not to peel apart the two pieces (the negative and the positive) before the developing time is up. With Polaroid Type 55 in 75 degrees that’s 20 seconds. If I want my negative to be darker I let it develop more (30-40 seconds). If I want it to be lighter, I peel it apart after 5 seconds. Just like you would in a darkroom under a lamp when you’re printing. Or if you’d leave a print in the developer for too long it would get too dark. But I just don’t put a lot of interest into the positive side of the film. It only shows me if I’m on target and if I shot what I thought I shot, or if I need to try it again. Plus, the model can see if she needs to adjust her pose or I can see if I need to adjust my exposure a bit. The negative is the big deal, the big kahuna, the whole enchilada… If I wanted a positive “only” why would I bother shooting pos/neg film? I’ve always wondered about this when some photographers say this about the exposure thing. And I could be wrong… I’ve just never concerned myself with the positive. Unless it pertains to happiness.
Speaking of HAPPINESS!!!!!!!! Check out the negatives!
and expired Polaroid Type 55 (peeling negative sadness)
If you have followed my work at all and have seen my Polaroid Type 85 or 665 images where I solarize the negatives, you will understand why I like the New55 film better than the Polaroid Type 55. What depth and funkiness and just WOW awesome!
After testing my first image (it’s a bit lighter than I’d ultimately like it) shooting at 50 ISO, I decided to change my settings just a tiny bit. I don’t remember exactly how much. But just a tad. So I probably shot the second exposure at about 35 ISO. I just had an impulse to do it and it worked out great.
And the Polaroid Type 55 for comparison (shot at 50 ISO):
So as you can see, much different films, but just beautiful, luscious, and YUMMY. For my work… this is what I want! The New55 Film reminds me more of the Polaroid 665 or 85 films than the 55 film. With the 665 you would always get little surprises that would put a unique spin on the image. I live for those little surprises. I enjoyed shooting with Type 85 on a Holga with a Polaroid back way more than I enjoyed shooting with Type 55 because of this. Like shooting a Holga with a peculiar light leak or solarizing your negatives in the sun. (see an earlier post I made about this here: http://www.zoewiseman.com/ZW/2011/08/04/85/)
Sure – you can get tack sharp images with a Hassy or some digital contraption, but I have always loved quirks. The quirkier the better. And the New55 film has got quirky covered.
With the image below this text, I tried peeling it at one minute instead of 2 minutes (the total developing time) to see if I could get some solarization happening by holding it up to the sun. I think that’s what the fog bit is on the lower left and the funky line near the top edge. I wish I would have been braver and pulled the negative at 2 seconds to see what would happen, but testing it just proves to me it’s possible – I just got chicken and waited too long. (see an earlier post I made about this here: http://www.zoewiseman.com/ZW/2011/08/04/85/ if you don’t know what I’m talking about)
And on this image below… as I was putting the film into the film holder the sleeve slipped off about a quarter inch. I caught it in time before it exposed the entire negative (cursing at myself), but as you can see it has the line at the top of her head where the sleeve slipped. I think it may have fogged the negative just a little bit because of that. But I love the way it turned out anyway.
So those are the images I was able to shoot from the 5 slides of film I received. I would like more please! haha. I’m just happy I have the negatives and it worked and that I didn’t disappoint myself or Bob as he’s worked tirelessly to make this happen. Does anyone have a few hundred thousand dollars lying around? Production must commence! If you are an investor and believe in art related goodness… give Bob your money so I can shoot this film every day. Please? With sugar on top?
One of the other things I love about the negative is it conforms to all the standard 4×5 film holders! Especially for the film holders on my scanner. The Polaroid Type 55 negative is just a smidgen larger than a 4×5, so trying to get that huge negative into a 4×5 film holder and scan the entire negative can be quite the challenge. The New55 negative fits in perfect with no fuss at all. It’s a true 4×5 negative.
I took some iPhone snaps of what I’m talking about so you can try to see what I mean.
Please let me know if you have any questions about my experience using the film below in the comments section. I hope I covered everything! If not, just ask! And if you have any questions about the production or that sort of thing – Please visit the New55 FILM project website and get to know the new goodness! Bob Crowley answers a lot of questions about this and his FAQ will tell you a bit too. And don’t forget to send him a few hundred thousand dollars. Annenberg… are you listening? Please please please? 🙂
Everyone have a very safe and sober Labor Day! Much love!